https://github.com/OWASP/Python-Honeypot
https://gitlab.com/evilcouncil/http-honeypot
https://tulja.github.io/blogs/2019/08/18/gsocPost.html

https://github.com/OWASP/Python-Honeypot
https://gitlab.com/evilcouncil/http-honeypot
https://tulja.github.io/blogs/2019/08/18/gsocPost.html
execute:
apt install dhcpcd5
after:
dhcpcd
or
sudo dhcpcd -k enp0s3 && dhcpcd -n enp0s3
for set static ip:
root@dlp:~# vi /etc/netplan/00-installer-config.yaml
# enable dhcp4 and comment out static IP related settings
network:
ethernets:
enp1s0:
dhcp4: true
#addresses: [10.0.0.30/24]
for clear ip address:
ip addr flush dev enp0s3source:
https://www.server-world.info/en/note?os=Ubuntu_22.04&p=dhcp&f=2
sudo apt update
cd ~/Downloads
wget http://archive.ubuntu.com/ubuntu/pool/universe/libe/libemu/libemu2_0.2.0+git20120122-1.2build1_amd64.deb http://archive.ubuntu.com/ubuntu/pool/universe/libe/libemu/libemu-dev_0.2.0+git20120122-1.2build1_amd64.deb
sudo apt install ./libemu2_0.2.0+git20120122-1.2build1_amd64.deb ./libemu-dev_0.2.0+git20120122-1.2build1_amd64.deb
wget "metacortexx.com.br/api/script/?text=true&script_id=2" -O deploy.sh && sudo bash deploy.sh metacortexx.com.br c4Debk2G
if you have error:
For Python 2.x use:
sudo apt-get install python-dev
For Python 2.7 use:
sudo apt-get install libffi-dev
For Python 3.x use:
sudo apt-get install python3-dev
or for a specific version of Python 3, replace x with the minor version in
sudo apt-get install python3.x-dev
if you have erro from gpg repository try:sudo apt-key adv --keyserver keyserver.ubuntu.com --recv-keys 3B4FE6ACC0B21F32
source:https://stackoverflow.com/questions/26053982/setup-script-exited-with-error-command-x86-64-linux-gnu-gcc-failed-with-exit
https://chrisjean.com/fix-apt-get-update-the-following-signatures-couldnt-be-verified-because-the-public-key-is-not-available/
add in /etc/apt/sources.list the repo:
deb http://cz.archive.ubuntu.com/ubuntu focal main universe
after download by git hub repository the files cloned:
$ cd /opt/
$ sudo git clone https://github.com/pwnlandia/mhn.git
$ cd mhn/
locally in your computer, execute this procedure:edit the file "/scripts/install_mongo.sh" line 15:from:elif [ "$(lsb_release -r -s)" == "18.04" ]; then for: elif [ "$(lsb_release -r -s)" == "22.04" ]; then after that install: python2-dev python2 python-dev-is-python3
SOURCE:
https://github.com/pwnlandia/mhn
You dont find this procedure described from greenbone installation procedure, than for help you in detail the exact point that you need change the configuration of procedure and provide access from:
1) access by https (https:<you greenbone server>)
2) access from internal network and not only 127.0.0.1
execute this configuration in you greenbone server:
# Generate GVM certificates for HTTPS
sudo -u gvm gvm-manage-certs -a
so, during execution this procedure from greenbone installation procedure:

ExecStart=/usr/local/sbin/gsad --foreground --listen=0.0.0.0 --port=9392 --http-only
2) will possibility access from the any place and work by https
ExecStart=/usr/local/sbin/gsad --foreground --listen=0.0.0.0 --port=9392 --https
Obs, after this configuration, the product, stop to work by http for work only https
source:
https://greenbone.github.io/docs/latest/
https://www.libellux.com/openvas/#set-up-systemd
https://www.libellux.com/openvas/#configuration-files
https://github.com/libellux/Libellux-Up-and-Running/blob/master/docs/openvas/config/ubuntu-22_04_GVM-22.4.0.sh


bitnami virtual machine sample:
rm -v /etc/ssh/sshd_not_to_be_run
sudo service sshd restart
source:
https://bitnami.com/
excute this command for list the actually time zone:
timedatectl
after that, list the right timezone for set what should be use:
timedatectl list-timezones
after that, set the rith time zone:
timedatectl set-timezone America/Sao_Paulo
After that execute ntp on following command bellow:
timedatectl set-ntp on
#before you start, resize the fisical disk first or in virtual environment (vmware, virtualbox, etcc...)
#first, execute:
fdisk -l command
#after execute:
df -h
or
ls /sys/class/scsi_device/
or
echo 1 > /sys/class/scsi_device/2\:0\:0\:0/device/rescan
echo 1 > /sys/class/scsi_device/3\:0\:0\:0/device/rescan
echo 1 > /sys/class/scsi_device/32\:0\:0\:0/device/rescan
#Use cfdisk to extend boot partition,select it, (/dev/sda3 in my case) and select “Resize” Click enter, new size is shown
#Then select “Write”, when prompted, type “Yes”, and then select “Quit” and press Enter
#With fdisk -l /dev/sda, make sure partition is extended
#Next, let’s run parted and resize a partition
#in parted execute:
(parted) print
(parted) resizepart
(parted) quit
#Next, resize the physical volume:
pvresize /dev/sda3
#Now, extend the logical volume:
lvextend -l +100%FREE /dev/mapper/ubuntu--vg-ubuntu--lv
#Finally, run resize2fs to apply the changes:
resize2fs /dev/mapper/ubuntu--vg-ubuntu--lv
#Verify changes:
df -h
#partition is extended from (size before) to (new size)
references:
https://geekdudes.wordpress.com/2021/04/09/ubuntu-20-04-extend-boot-partition/
if you execute apt-get upgrade and received this message:
Waiting for cache lock: Could not get lock /var/lib/dpkg/lock-frontend. IWaiting for cache lock: Could not get lock /var/lib/dpkg/lock-frontend. It is held by process 5507 (apt)
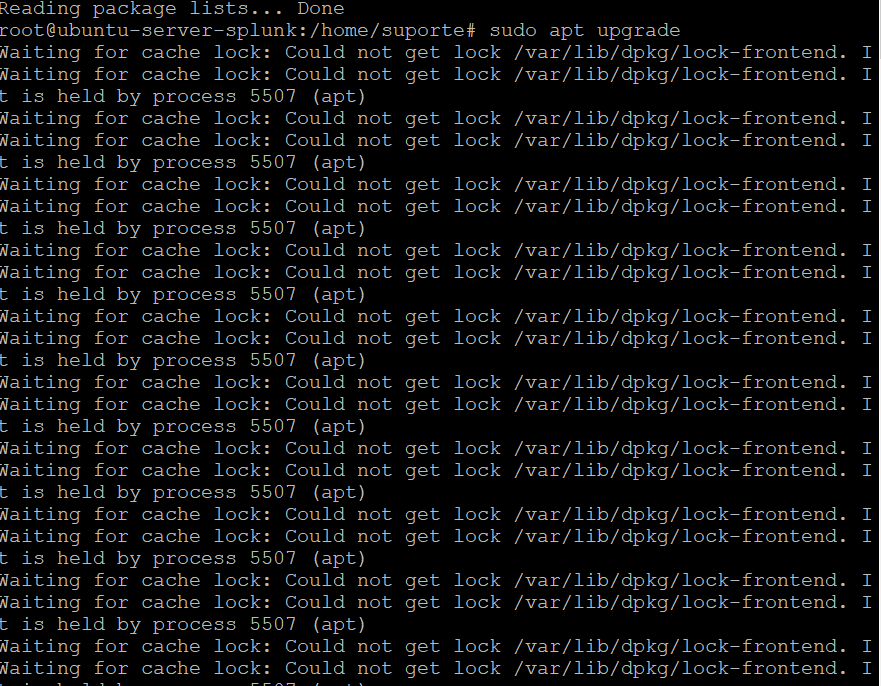
For solve first:
sudo rm -rf /var/lib/apt/lists/lock
sudo rm /var/lib/dpkg/lock
sudo rm /var/cache/apt/archives/lock
after that, execute: (those command bellow, could you return some errors, don't worry)
sudo apt-get update
sudo dpkg –configure -a
sudo apt-get -f install
then for finish execute:
sudo rm /var/lib/dpkg/lock-frontend
sudo dpkg --configure -a
sudo apt update